In today’s fast-paced world, finding what you need — exactly when you need it — should be effortless. That’s where Around2Me comes in. Whether you're navigating a new city, running errands, or just looking for a bite nearby, Around2Me helps you instantly find nearby essentials like ATMs, restaurants, hospitals, gas stations , and much more. Around2Me 🚀 What Makes Around2Me Different? Unlike many location-based apps that are bloated with unnecessary features or force users to sign up, Around2Me is lightweight, private, and instant . Here's how: 📍 Location-Based Discovery The app instantly detects your current location and shows you relevant nearby places — from pharmacies to petrol pumps, cafes to banks. 🗺️ Map Integration Tap any place to view it on the map and get turn-by-turn directions in seconds. 🧩 Clean Categories Looking for something specific? Use quick-access filters like Hospitals , ATMs , Coffee Shops , or Parking . 🔐 No Signups, No Data Collection ...
Create a new application facebook login and authentication a facebook user using their iOS SDK with Cocoapods. Below are the steps in which we'll be following:
First Getting Started guide from Facebook's iOS SDK Documentation
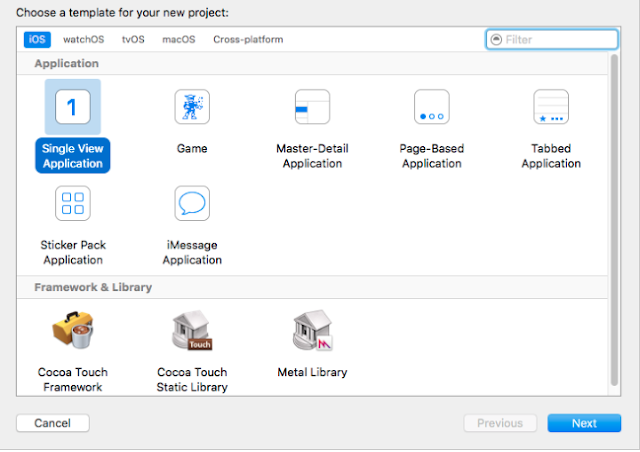
Create a new iOS project Swift
https://developers.facebook.com/docs/ios/getting-started
Got create podfile -> pod init
Open podfile -> open podfile
Then add Bundle id your ios project like com.xxxx, Configuring Facebook with Bundle ID
Then go ahead Download facebook sdk for ios other wise install pod file your project.
Go ahead to open terminal and go ahead your project folder.
Got create podfile -> pod init
Open podfile -> open podfile
Enabling Facebook's Authentication Mechanism
In order for your app to behave nicely with Facebook's authentication mechanism, you need to edit your .plist file according to the facebook authentication Step 4: Configure Xcode Project of the Getting Started guide. Go ahead and replace the placeholder strings with your Facebook App Id and Application name:
- In Xcode, right-click your project's Info.plist file and select Open As -> Source Code.
- Insert the following XML snippet into the body of your file just before the final </dict> element.
- Replace {your-app-id}, and {your-app-name} with your app's App's ID and name found on the Facebook App Dashboard.
Swift 3 AppDelegate Configurations
Go to ahead swift project - AppDelegate.swift file.
Import FBSDKCoreKit
Next, FBSDKApplicationDelegate with in launchOptions
like this afterwards:
import UIKit
import FBSDKCoreKit

@UIApplicationMain
class AppDelegate: UIResponder, UIApplicationDelegate {

    var window: UIWindow?


    func application(_ application: UIApplication, didFinishLaunchingWithOptions launchOptions: [UIApplicationLaunchOptionsKey: Any]?) -> Bool {

        FBSDKApplicationDelegate.sharedInstance().application(application, didFinishLaunchingWithOptions: launchOptions)

        return true
    }

    func application(_ app: UIApplication, open url: URL, options: [UIApplicationOpenURLOptionsKey : Any] = [:]) -> Bool {

        let handled = FBSDKApplicationDelegate.sharedInstance().application(app, open: url, sourceApplication: options[UIApplicationOpenURLOptionsKey.sourceApplication] as! String!, annotation: options[UIApplicationOpenURLOptionsKey.annotation])

        return handled
    }

    //...
}
Integration FBSDKLoginButton
Open up ViewController.swift and make the following source code edit
import UIKit
import FSocialLogin

class ViewController: UIViewController, FBSDKLoginButtonDelegate {

    override func viewDidLoad() {
        super.viewDidLoad()

        let loginButton = FBSDKLoginButton()
        view.addSubview(loginButton)
        //frame's are obselete, please use constraints instead because its 2016 after all
        loginButton.frame = CGRect(x: 16, y: 50, width: view.frame.width - 32, height: 50)

        loginButton.delegate = self
    }
}
Output :-
After click loginButton
You will be able to grant permission for your iOS application to know about this user:
Keychain Sharing
In order to verify that the authentication is successful, you should implement the follow delegate methods and then set your button delegate:
ViewController.swift
class ViewController: UIViewController, FBSDKLoginButtonDelegate {

    override func viewDidLoad() {
        //...
        loginButton.delegate = self
    }

    func loginButtonDidLogOut(_ loginButton: FBSDKLoginButton!) {
        print("Did log out of facebook")
    }

    func loginButton(_ loginButton: FBSDKLoginButton!, didCompleteWith result: FBSDKLoginManagerLoginResult!, error: Error!) {
        if error != nil {
            print(error)
            return
        }

        print("Successfully logged in with facebook...")
    }
}
If your Facebook doesn't show a "Log out" label, the authentication was mostly unsuccessful. To fix this, enable Keychain Sharing in your application settings in Xcode:
Run your application and perform the Log in authentication again. Now your button "Log out" label:
output: -
Facebook Login - Facebook Authentication and Cocoapods


This is an awesome post. Really very informative and creative contents.
ReplyDeleteios app Devlopment company in chennai